Part III: Shading the Cover
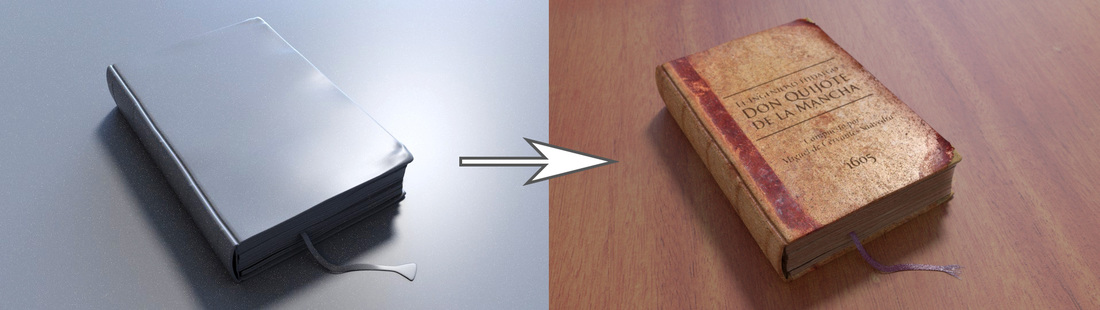
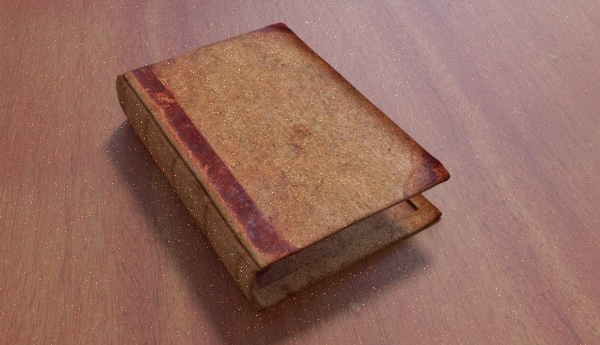
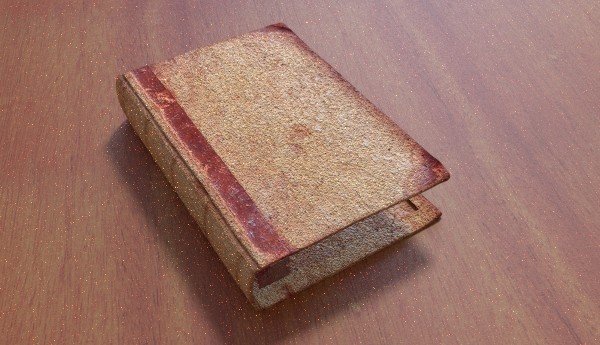
In this part of the old book tutorial, we will be taking the model we created in the previous part and begin creating materials for the book. We are going to focus exclusively on the book cover, and use Photoshop to create color, bump, and specular maps from the reference photos that we took at the beginning. By the end of this part, we will have a nicely shaded book cover. If you didn't follow along the previous part of the tutorial but would like to jump in now, you can download the .blend file with the book cover model here, as well as the reference image that we will be using to create the textures.
|
| ||||
Step 1.
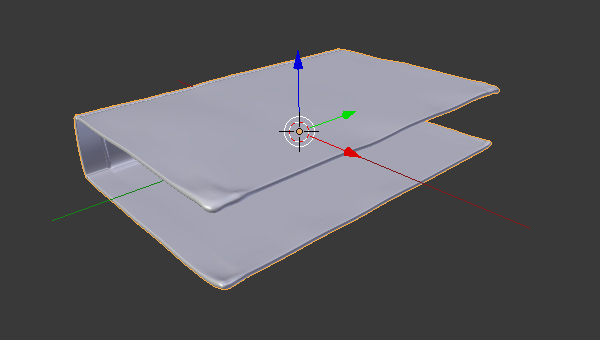
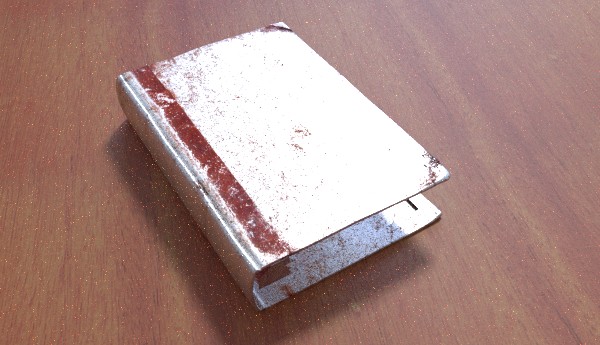
Open up the model of the cover in Blender.
Step 2.
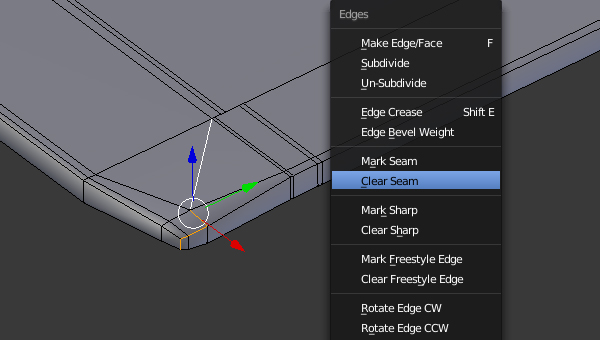
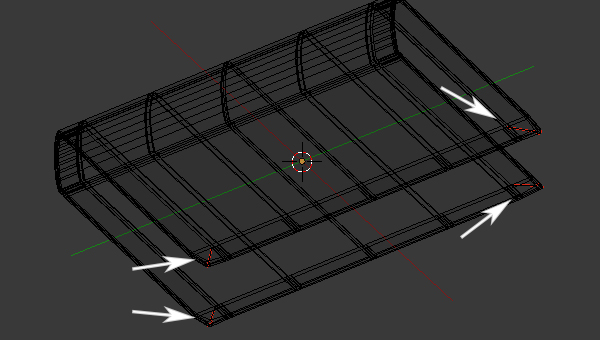
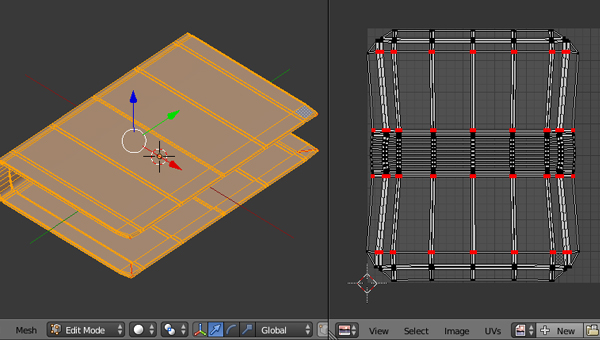
Let's begin adding seams so that we can UV unwrap the model. Enter edit mode and zoom into one correr. Select the edges shown below, press Ctrl+E to bring up the Edge menu, and select Mark Seam. The edges will become highlighted in red. Repeat this process for the other three corners.
Step 3.
Divide the window horizontally and open up a UV/Image Editor window beside the 3D view. Still in edit mode, select the entire model with Ctrl+A, press U to bring up the UV Mapping menu and select Unwrap. The resulting UV layout is not ideal, but it will work fine for our purpose. If you need to tweak the UV layout, you can adjust some vertices in the UV/Image Editor, hit P to pin them in place, and unwrap again.

Step 4.
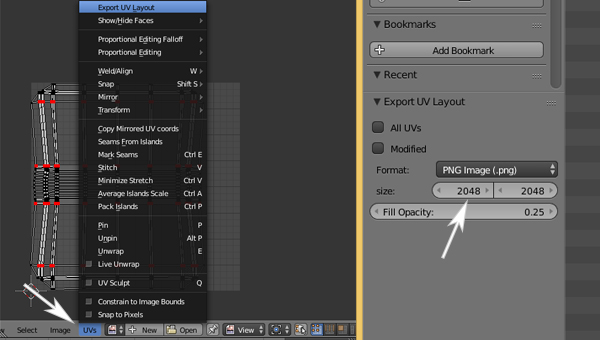
To save the UV layout as an image file, go to UVs > Export UV Layout. This will determine the size of our textures, and the default size of 1024x1024 pixels is too low for a close-up shot, so increase it to 2048x2048 pixels. Save the UV layout as a .png.
sTEP 5.
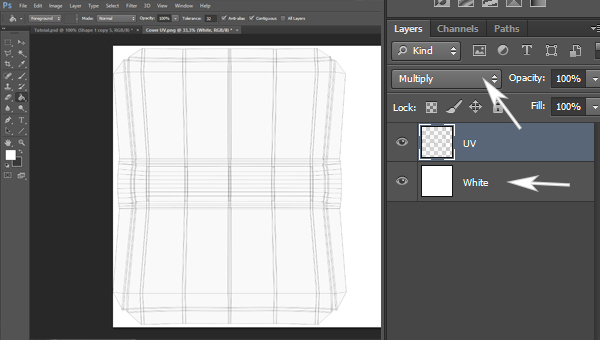
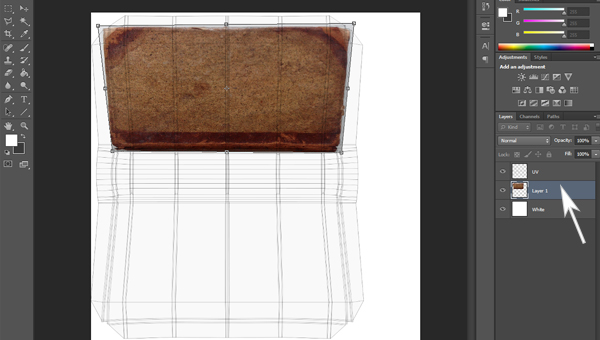
Open the UV layout .png in Photoshop. Name the layer with the UV layout 'UV' to avoid confusion and set the blending to Multiply. This will allow only the black lines to be visible, while the rest will be transparent. To be able to see the layout better, create a layer underneath and fill it with solid white.
Step 6.
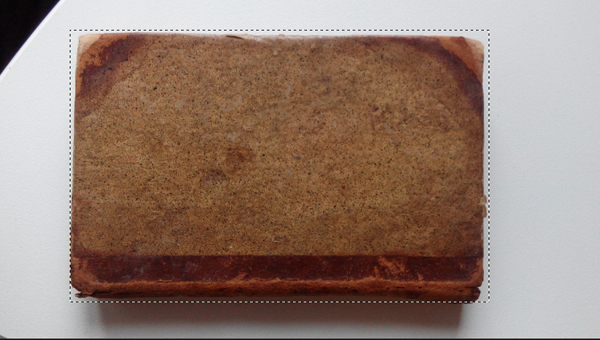
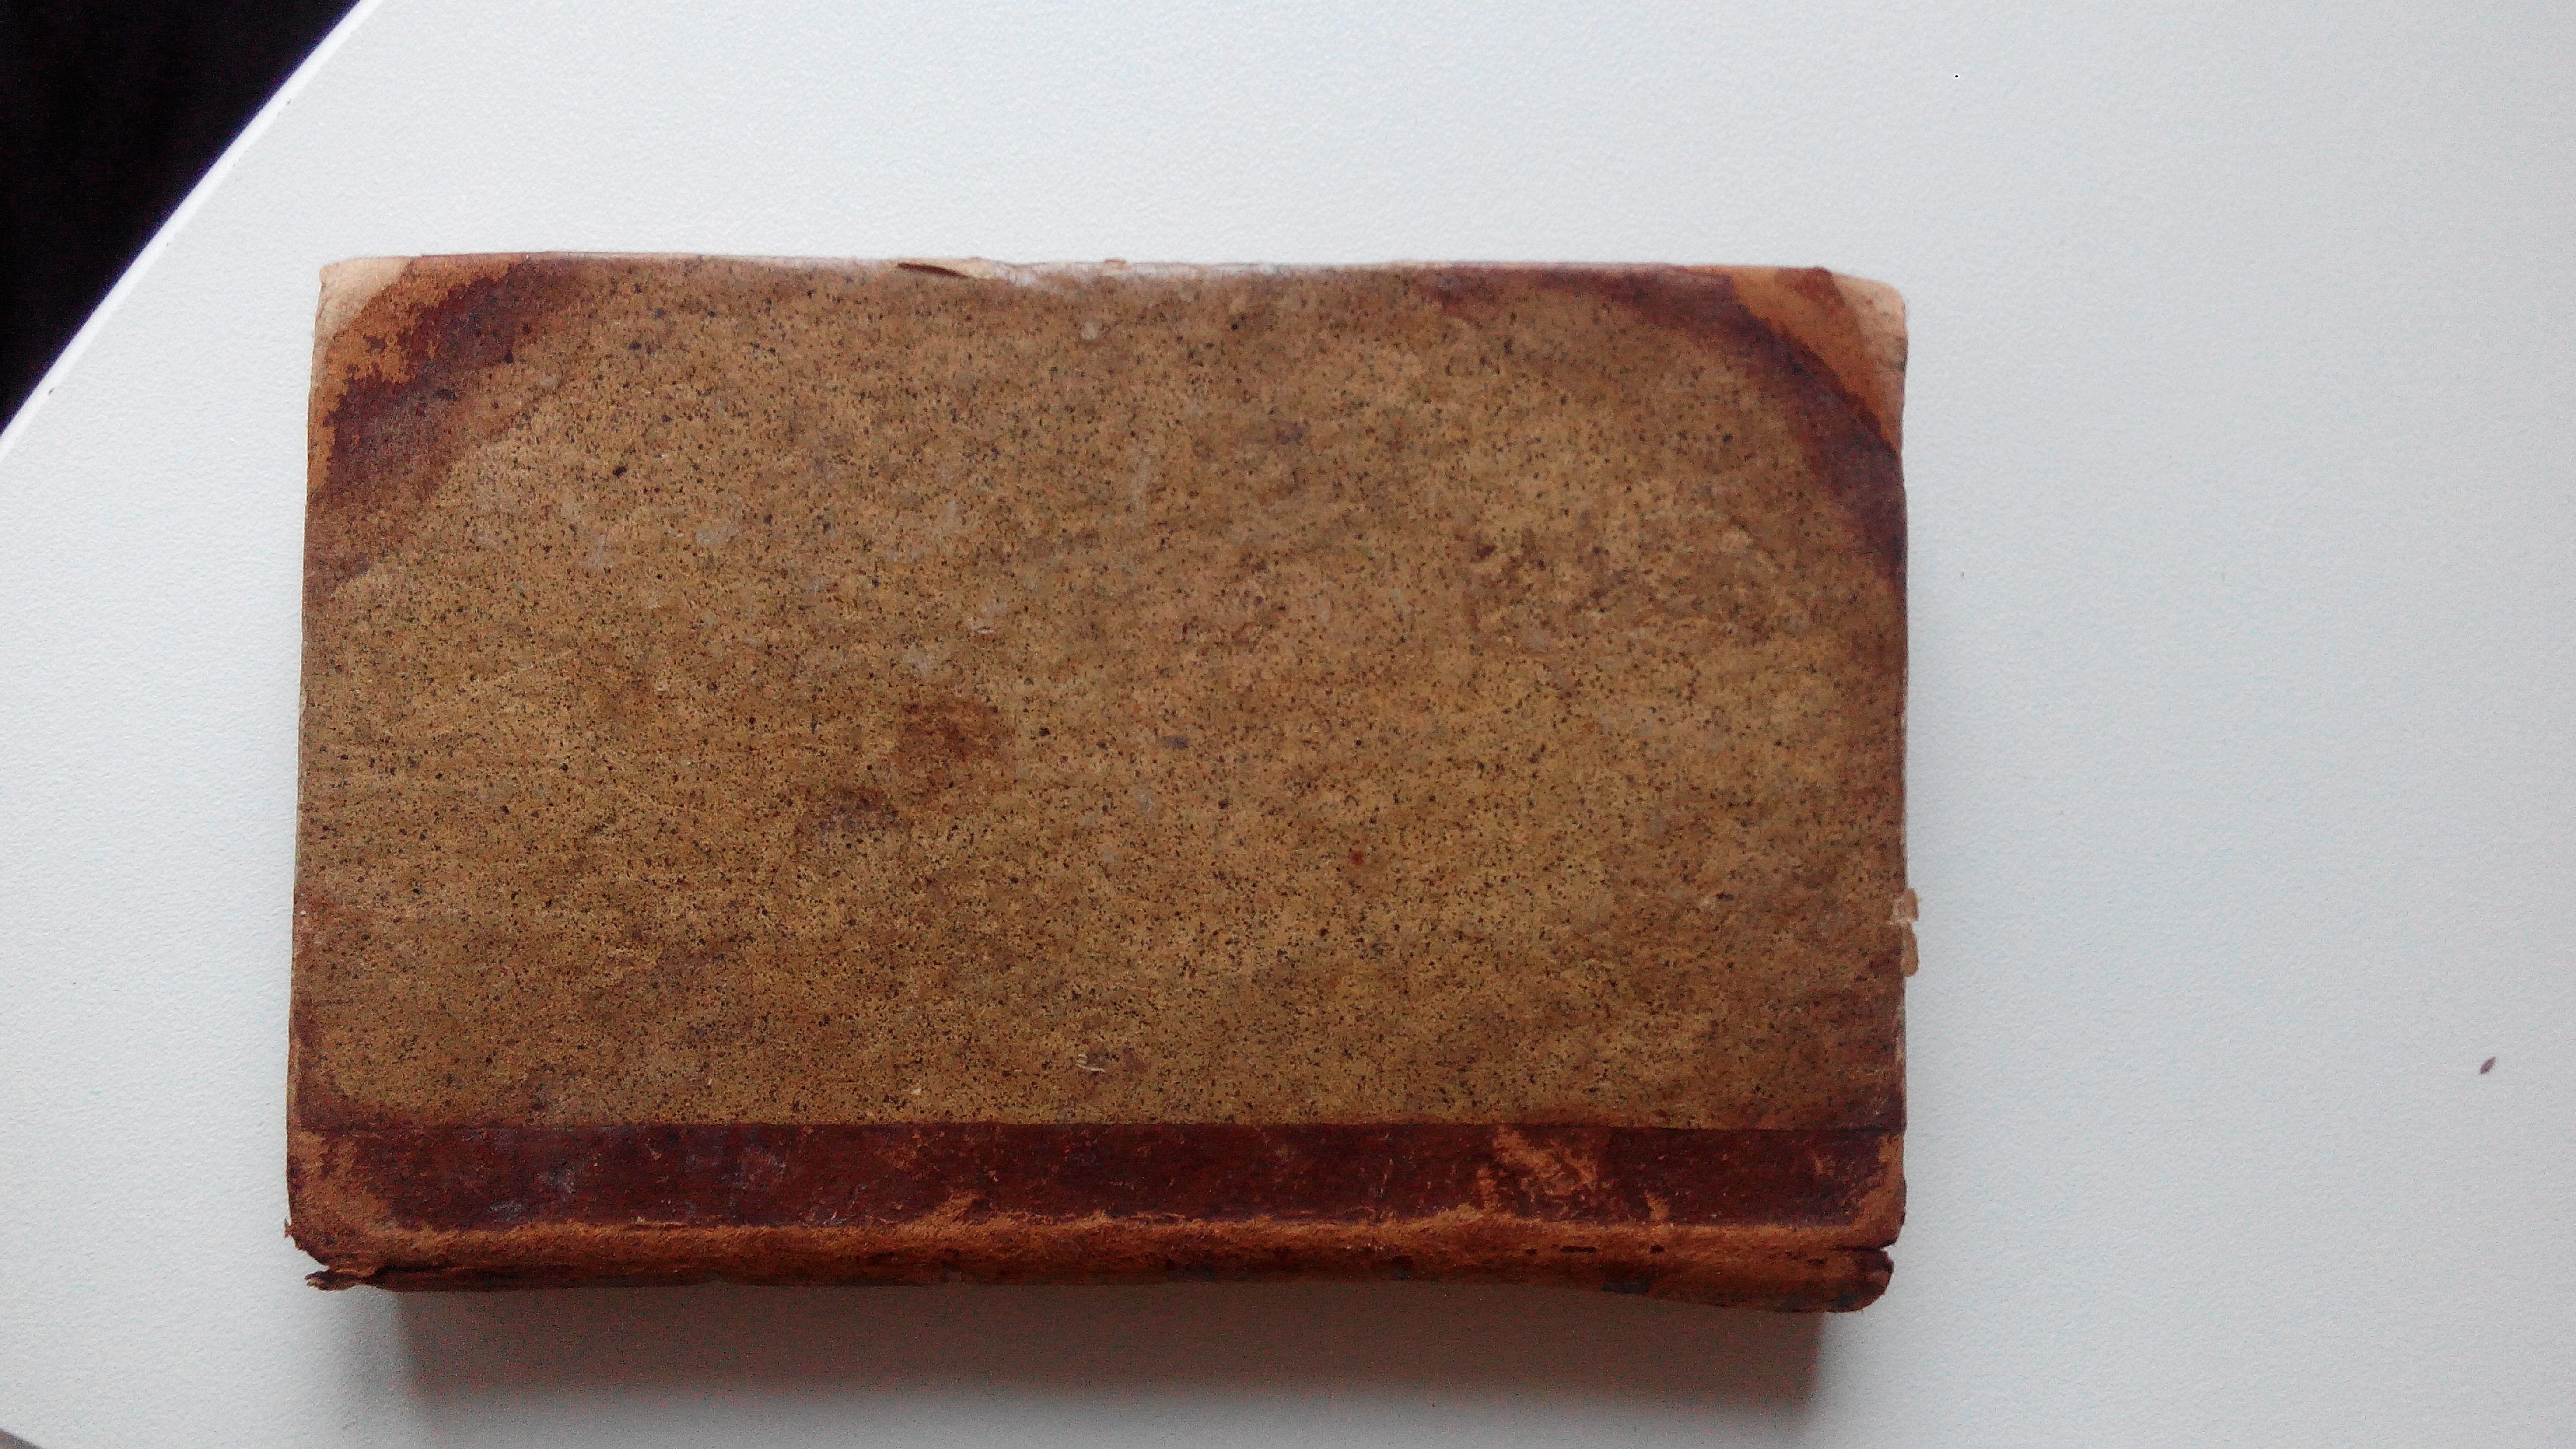
Open the reference image of the book cover. Select the relevant area with the Marquee tool and copy it to a layer below the UVs. Use the free transform tool to deform it so that it roughly conforms to one side of the UV layout.
Step 7.
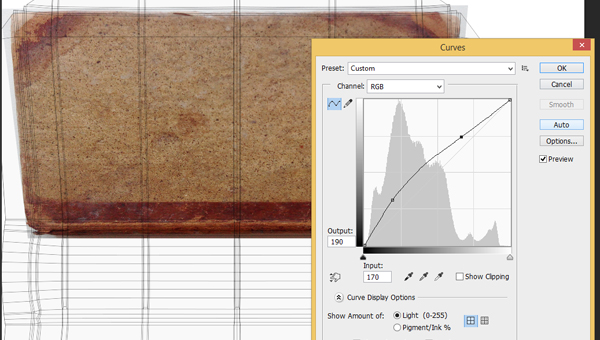
Color correct the image before going further. It seems too dark, so lighten it slightly with Curves. Alternatively, you can use Levels or any other color correction tools in Photoshop, as needed.
Step 8.
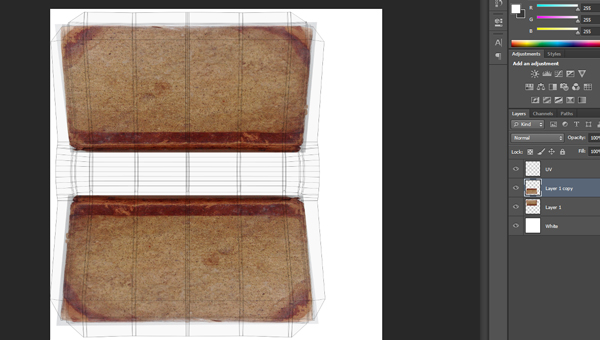
Duplicate the layer with the photograph, rotate it 180º and place it on the other side of the cover.
Step 9.
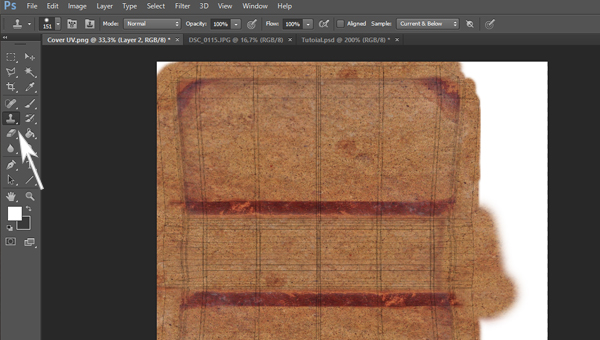
Time to clone! Select the clone stamp tool, choose a sampling source with Alt+click and begin cloning the uncovered areas of the UV layout. Try to avoid evident repetition and make sure all area under the UVs is covered. The edges of the original photographs should not be visible.
Step 10.
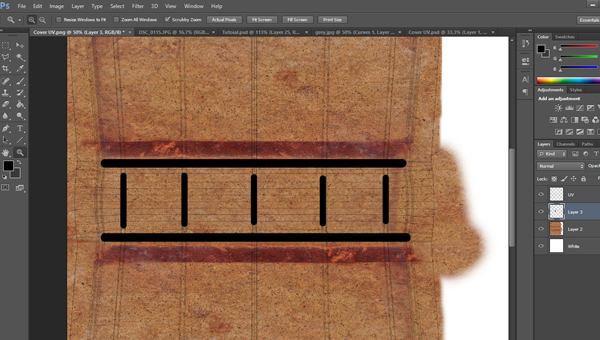
There are some parts of the cover -mainly ridges- that should be darker in color. To simulate this effect, create a new layer, and with the brush tool, paint black lines over the ridges in the spine.
Step 11.
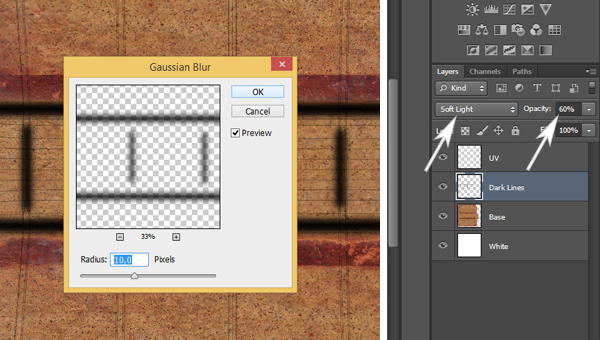
Go to Filter > Blur > Gaussian Blur and apply a blur to the dark lines. Lastly, set the blend mode to soft light and the opacity to 60%.
Step 12.
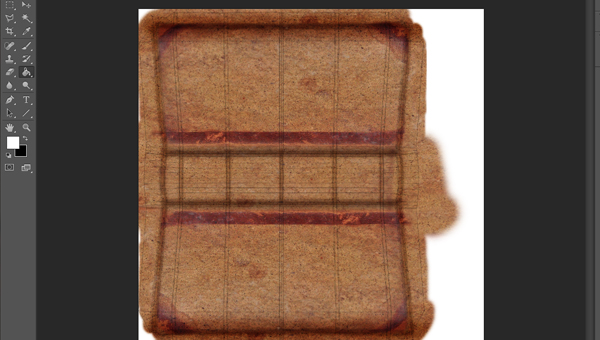
Repeat the previous steps to darken the edges of the cover. You should end up with something like this:
Step 13.
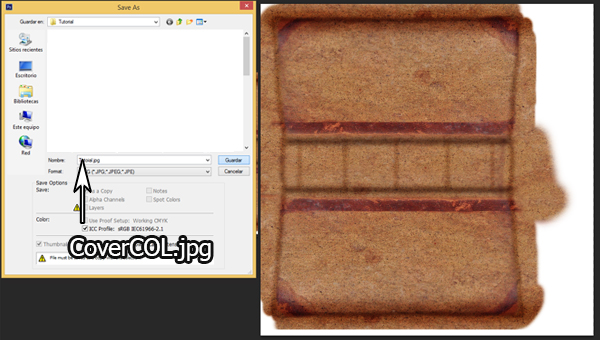
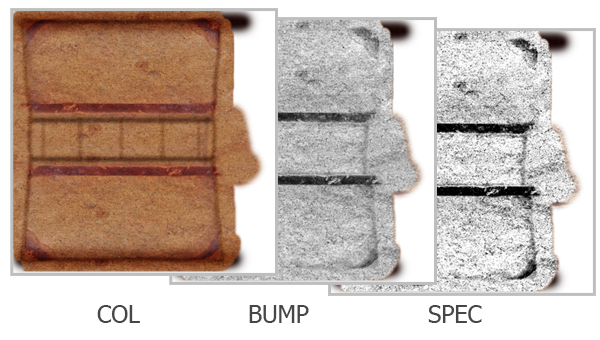
The color map is done, so it needs to be saved as a .jpeg. Hide the UV layer and save the image as CoverCOL.jpeg.
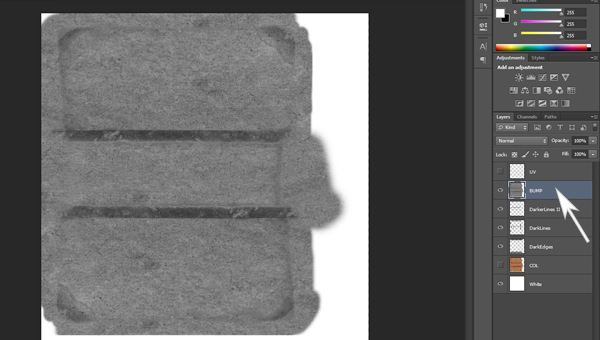
sTEP 14.
Now we are going to create the bump map. Duplicate the Color layer and name it Bump. The bump map needs to be a greyscale image, so the layer must be desaturated to eliminate the color data. To do this, select the layer and go to Image > Adjustments > Desaturate, or simply press Ctrl+Shift+U.
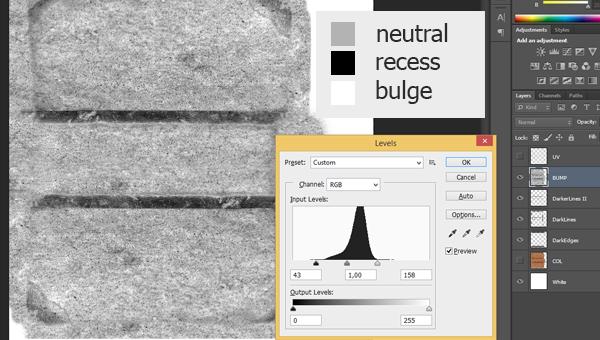
Step 15.
Adjust the values with Levels. We are aiming for a mostly midgrey value with some distinct light and dark areas. Save it as CoverBUMP.jpg.

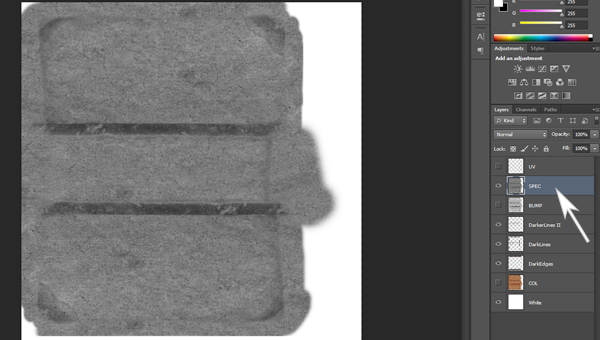
Step 16.
We are now going to create the specularity map, which will indicate which areas are reflective and which ones are not. As with the bump map, duplicate the color layer, desaturate it, and name it Specular.
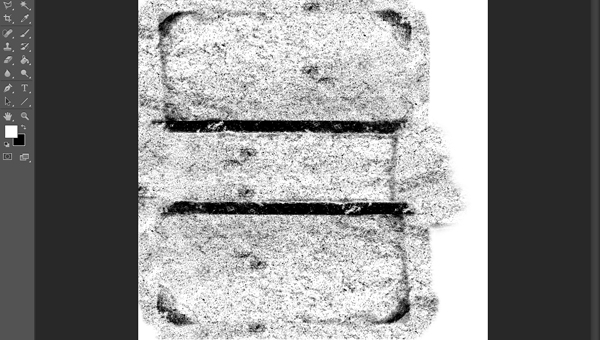
Step 17.
As before, adjust the values with Levels. The aim here is to have mostly black or white areas, with little midtones. The white areas will become shiny, while the black ones will be diffuse. Save the image as CoverSPEC.jpg.

Step 18.
You should now have three .jpeg's saved on your computer: CoverCOL.jpg, CoverBUMP.jpg, and CoverSPEC.jpg.
Step 19.
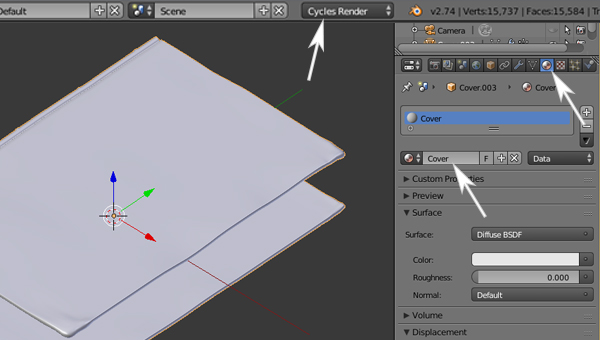
Let's go back to Blender. It's time to create a new material. In the top bar, make sure Cycles Render is enabled. Select the cover and, under the materials tab, create a new material and name it Cover.
Step 20.
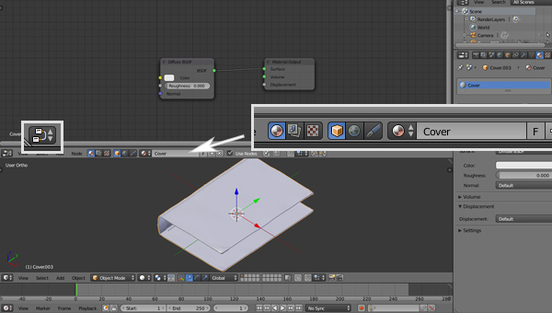
We are going to be working on the material with nodes, so divide the view and bring up a Node Editor. Make sure the Cover material is selected. By default, it should consist of a Diffuse node plugged into a Material Output node.
Step 21.
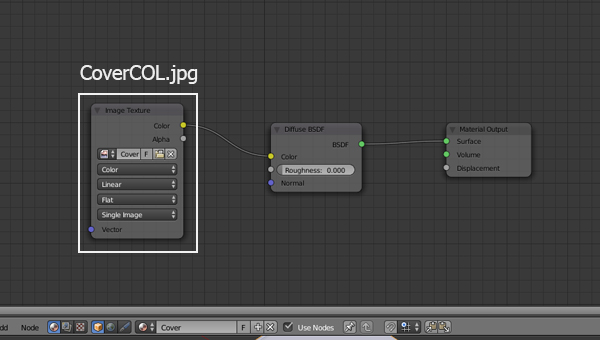
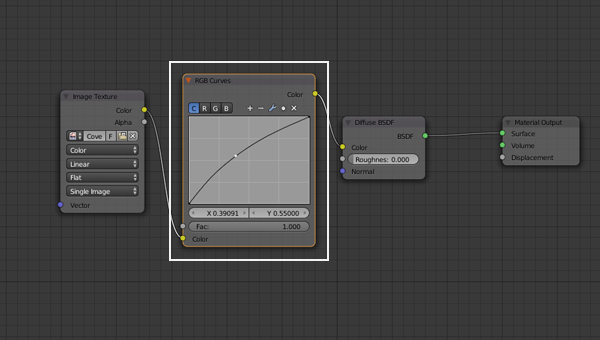
Let's focus on the diffuse shader first. Add a texture node and open the CoverCOL.jpg. Connect it to the color input of the diffuse node.
Step 22.
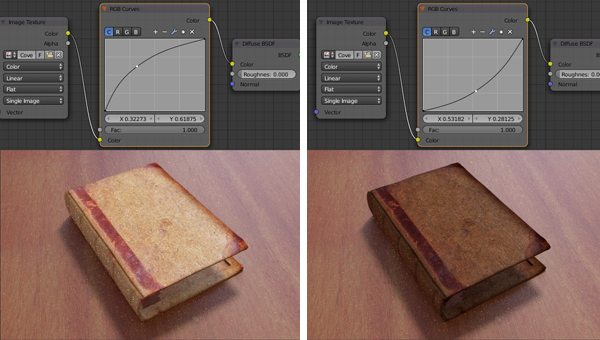
Add an RGB Curves (find it under the Color section) node between the texture and the diffuse shader. This will allow us to easily vary the darkness of the cover. Two exaggerated exmples are shown below.
Step 23.
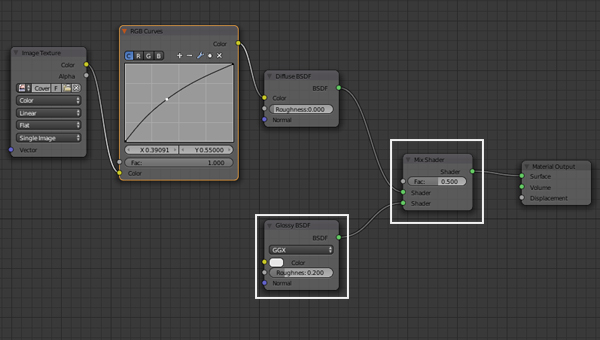
It's time to add some glossiness to the book cover. Add a Mix Shader node between the Diffuse and the Output nodes. Add a Gossy BSDF shader node and connect it to the bottom socket of the Mix Shader.
Step 24.
The specular map we created before is what should determine which parts recieve the Glossy shader, which receive the Diffuse, and which recieve a mix of both. Add another image texture, open up the CoverSPEC.jpg, and connect it to the factor of the Mix Shader.

Step 25.
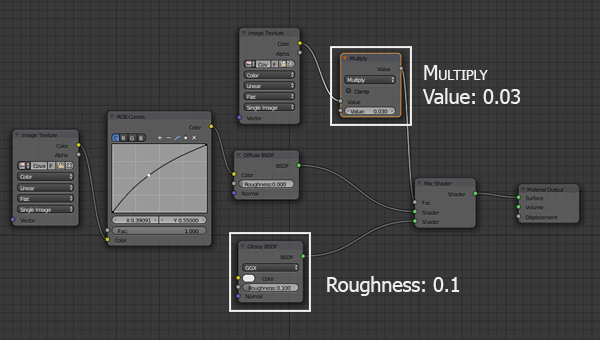
Well, that last render looks terrible. we can see teh specular map is working because there are some dimples which are not glossy, as well as the red bar. But of course, the glossiness of the glossy areas is far too strong. To fix this, add a Multiply node (find it under the Converter section) after the specular map with the value set to 0.03. This effectively multiplies the strength of the glossiness factor by 0.03, which is the same as making it 1/0.03 = 33 times less poweful.
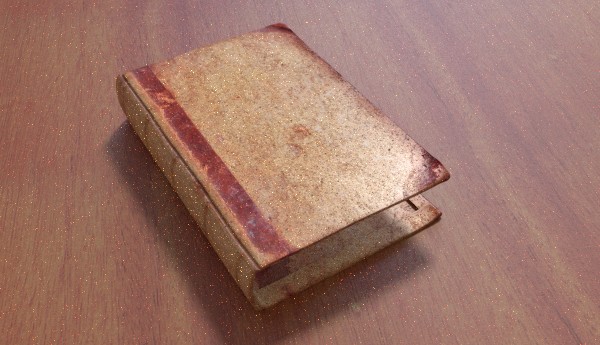
Also, reduce the Roughness of the Glossy Shader to 0.1, which will give us slightly tighter, more defined reflections. we should now be able to see the light interacting nicely with our model.
Also, reduce the Roughness of the Glossy Shader to 0.1, which will give us slightly tighter, more defined reflections. we should now be able to see the light interacting nicely with our model.
Step 26.
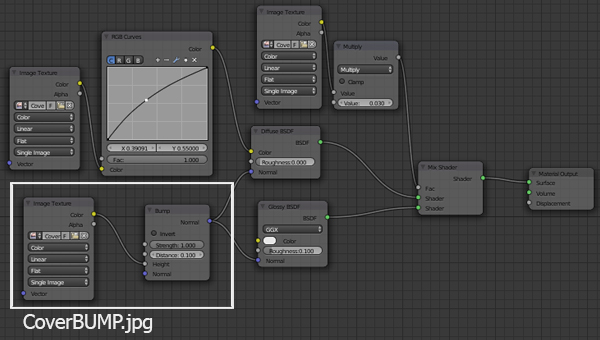
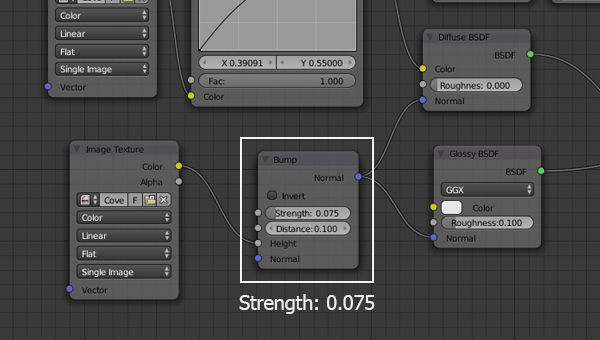
Let's add the bump map we creater earlier. Add yet another image texture, open up the CoverBUMP.jpg, connect it to the Height input of a Bump node (under the Vector section) and then to the Vector inputs of both the Diffuse and Glossy shaders.
Step 27.
The default value of the Bump node is obviously far too strong, so change it to something more appropriate like 0.075. The cover should be mostly smooth, so the effect of the bump map should be very subtle.
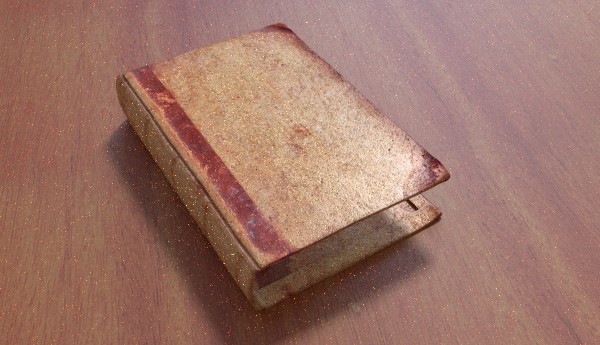
The main Cover shader is done! In the next part of this tutorial, we will expand this material in order to add a title to the cover. The main topics that will be covered to achieve that effect are using multiple UV maps, using Photoshop to create normal maps, and combining bump and normal maps in the same material.

