Tutorial Overview
By the end of this tutorial, you'll have created an old book in Blender. We'll use a couple of real books to take some pictures to use as textures for our model. Aside from that, all youneed to follow along is an image processing software (Photoshop or Gimp) and of course, Blender.
The tutorial will consist of three parts: modelling, texturing, and shading.
The tutorial will consist of three parts: modelling, texturing, and shading.
Modelling |
Texturing |

Shading |
Part I : Modelling
|
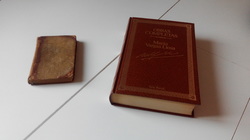
Step 1.Find a few books that fit the style you're aiming for. I'll be basing this book on two references. The goal is to create a book with the size and shape of one, but with the whethered texture of the other.
|
|
|
Step 2.We'll begin my modelling the pages of the book. Scale the default cube to size in Edit Mode. We'll only work on one half and duplicate it along the y axis, so add a loop cup to divide it in two. Delete the top and bottom faces, delete one half of the model and add the mirror modifier.
|
|
|
Step 3.Create about 15 loopcuts along the rectangle. On the side that faces the x direction, select every other edge (you can use "checker select") and move them slightly on the x direction. Do the same with the side that faces the y axis. You should end up with a fence that is corrugated on three sides. This will help give the impression of layers of pages later on.
|
|
|
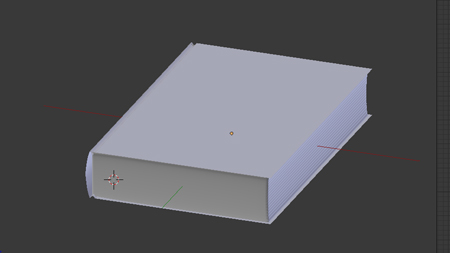
Step 4.Now we're going to model the cover of the book. Create a cube that is the same height as the pages but slightly larger in the x and y directions. As before, add a loop cut in the middle along the x axis, delete half of the model and add a mirror modifier. Then, delete three sides of the cube as shown in the images. Now it starts to look a little like a book.
|
|
|
STEp 5.To shape the spine, create three loop cuts close together on the top and bottom faces, and move the middle one down. This will create the ridge where the cover folds. Next, create several loopcuts along the spine. Select the middle one and, with proportional editing activated (press "O") and set to sphere falloff, move it outwards.
|
|
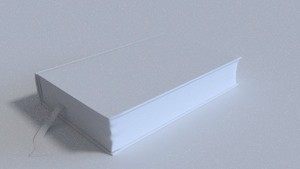
Step 6.Time to make things look pretty. Nothing crucial in this step. Simply tweak vertecies to improve the shape and fix the pages where the rigde intersects them. You can curve the pages slightly and add loopcuts to thin out the corrugated sections in some places. My result by the end of this step is shown on the left.
|
